Ich finde Gemüsewraps genial im Sommer, die sind wie echte Tortillawraps, nur eben gesund ;) Da ich gern viel esse, muss ich mir bei denen auch keinen Kopf machen und kann mir so viele “rollen” wie ich möchte.
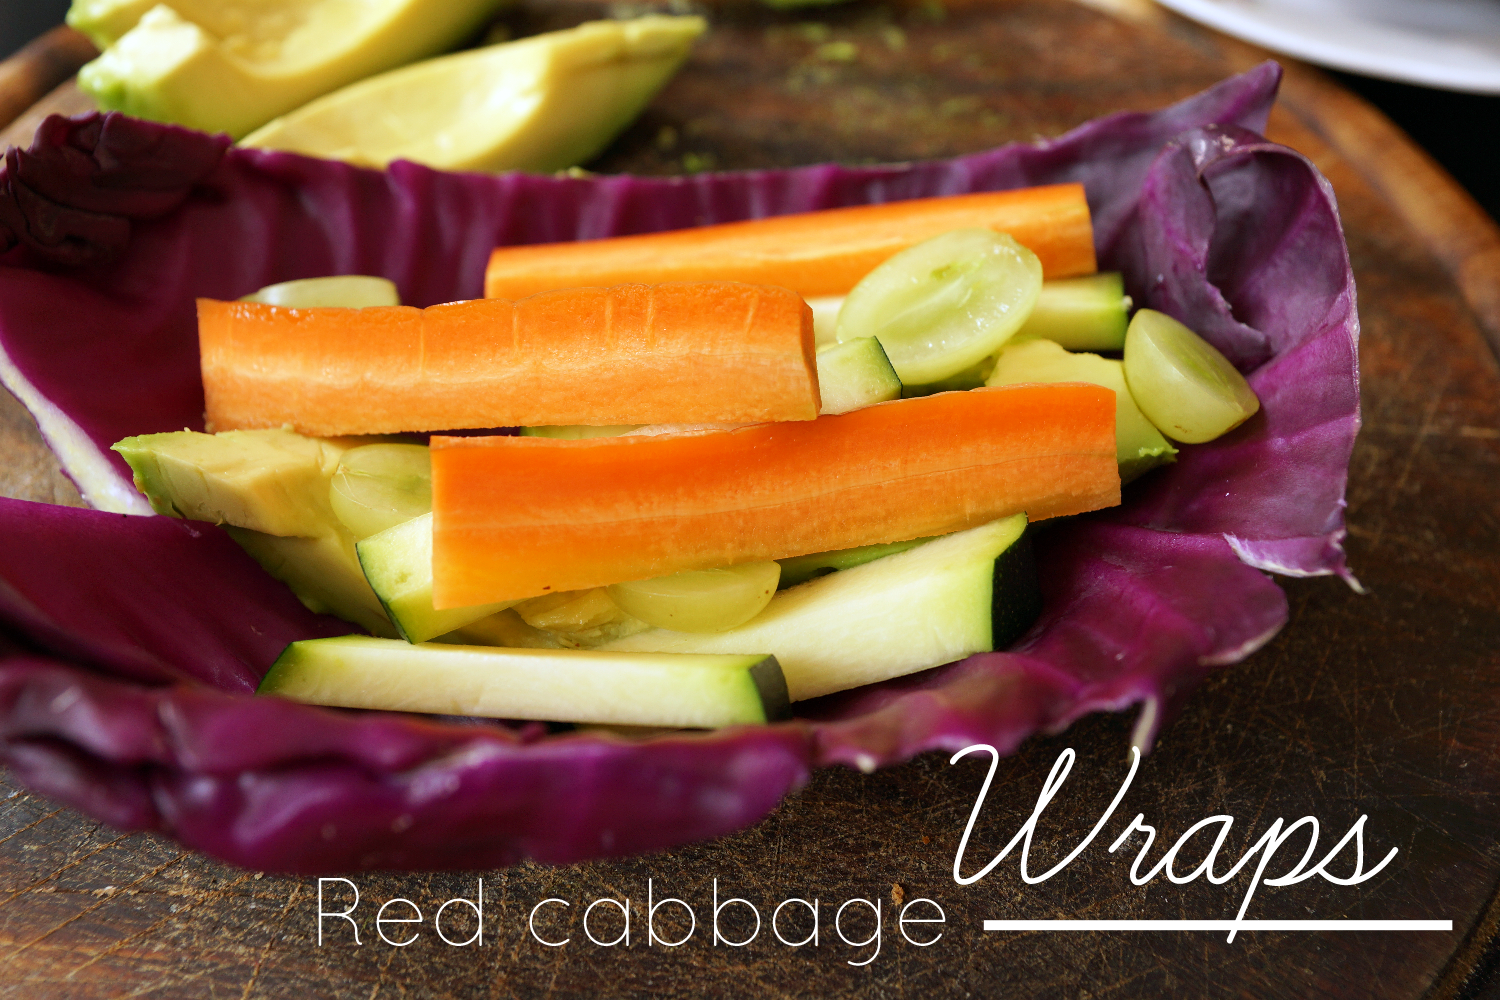
Dabei muss man auf nichts verzichten. Man hat seine Remoulade in Form von Guacomole und das gewisse Extra mit den Trauben. Klingt super ausgefallen? Ist es aber nicht! Und die Farbe ist natürlich auch unschlagbar.
Mittwochs machen wir auf Arbeit immer ein Rohkostmittag unter Kollegen. Der Renner sind natürlich solche Gemüsewraps, bisher hatten wir sie aber noch nicht mit Rotkohl…das werde ich mal vorschlagen ;) Ich glaube die Mädels werden genauso begeistert sein wie ich!
—
I think veggie wraps are brilliant in summer, they’re are similar to tortilla based wraps, just healthy ;) As I love to eat a lot, these ones are perfect because I can eat as much as I want and don’t have to worry.
And you don’t even miss a thing. Instead of your regular ol’ mayo you have your guac. And for that extra something you can add grapes. Sounds fancy? But it’s not! And the color is unbeatable.
Wednesdays we have our raw vegan lunch with some colleagues. A lot of the times we have some kinds of veggie wraps, but we never had them with red cabbage. Definitely gonna recommend that, the girls will love them!
Recipe (for two)
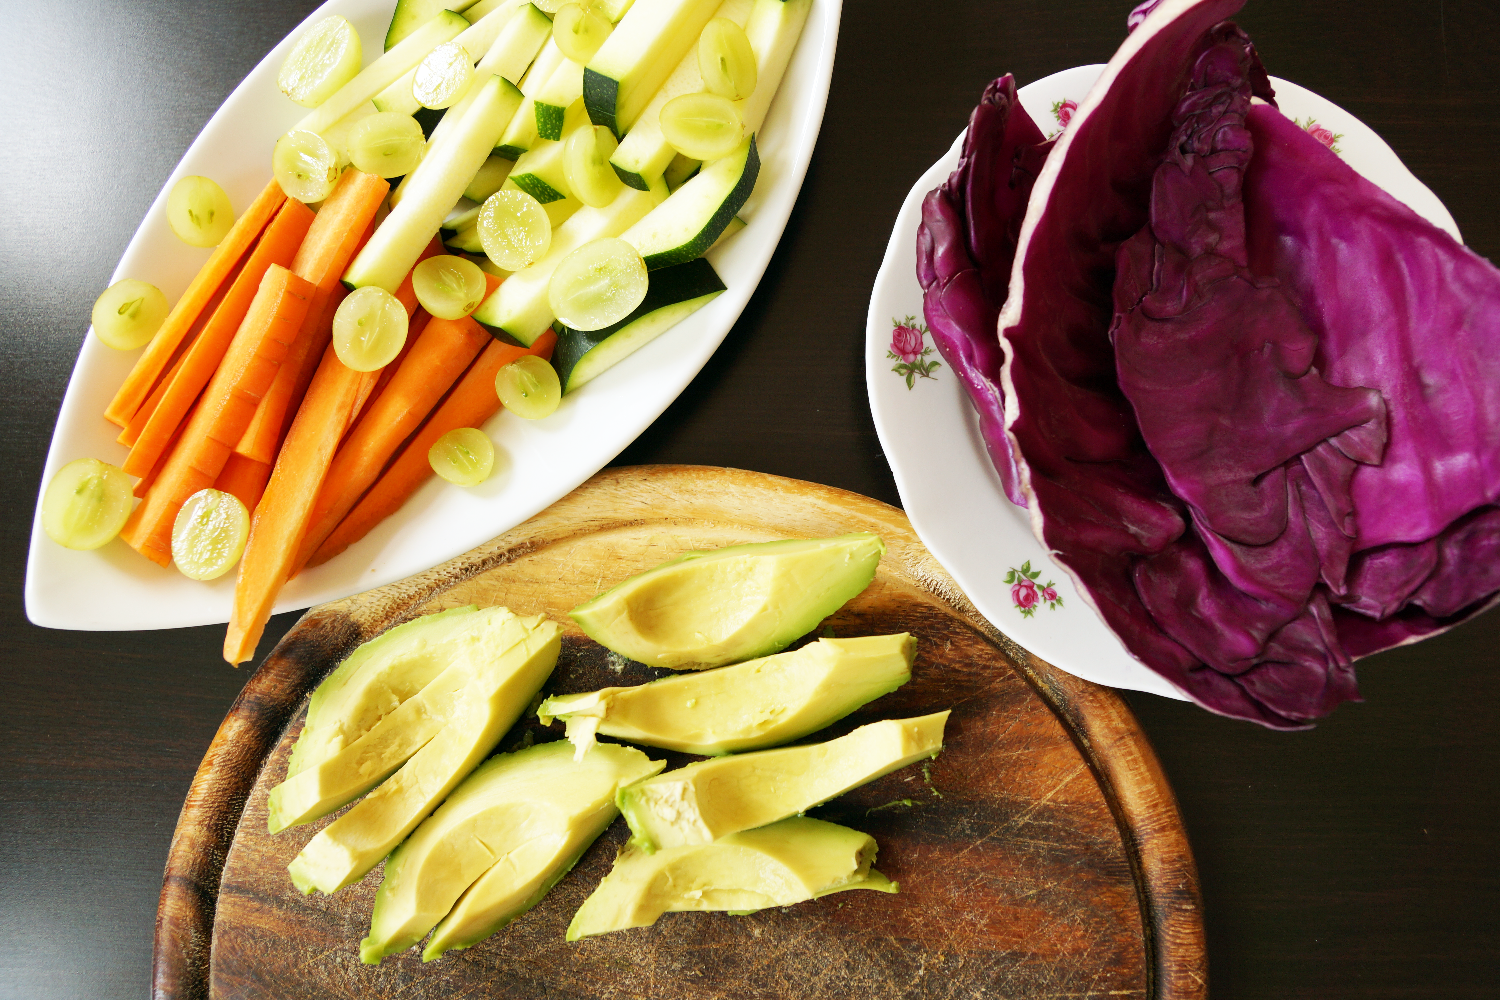
What you need
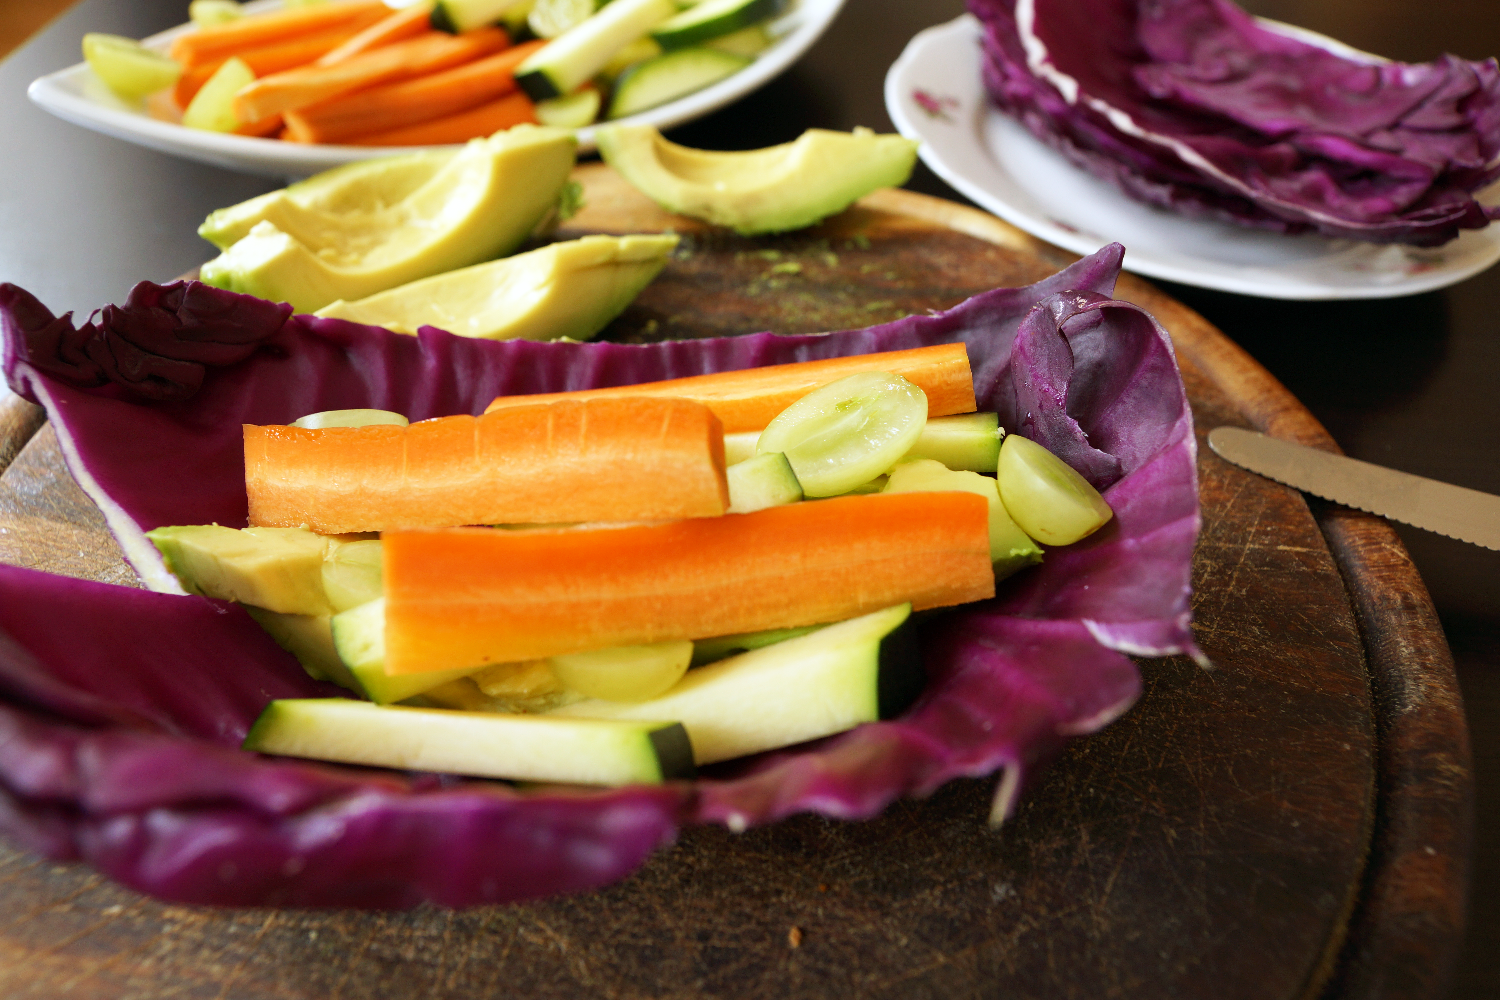
- 4 large red cabbage leafs
- 2 large carrots
- 1/2 of a medium zucchini
- 2 handful of grapes
- 1-2 avocados
What you wanna do
- Wash all the veggies
- Cut up the veggies just as you like
- Cut or mash up the avocados
- Nicely arrange all the ingredients on the table
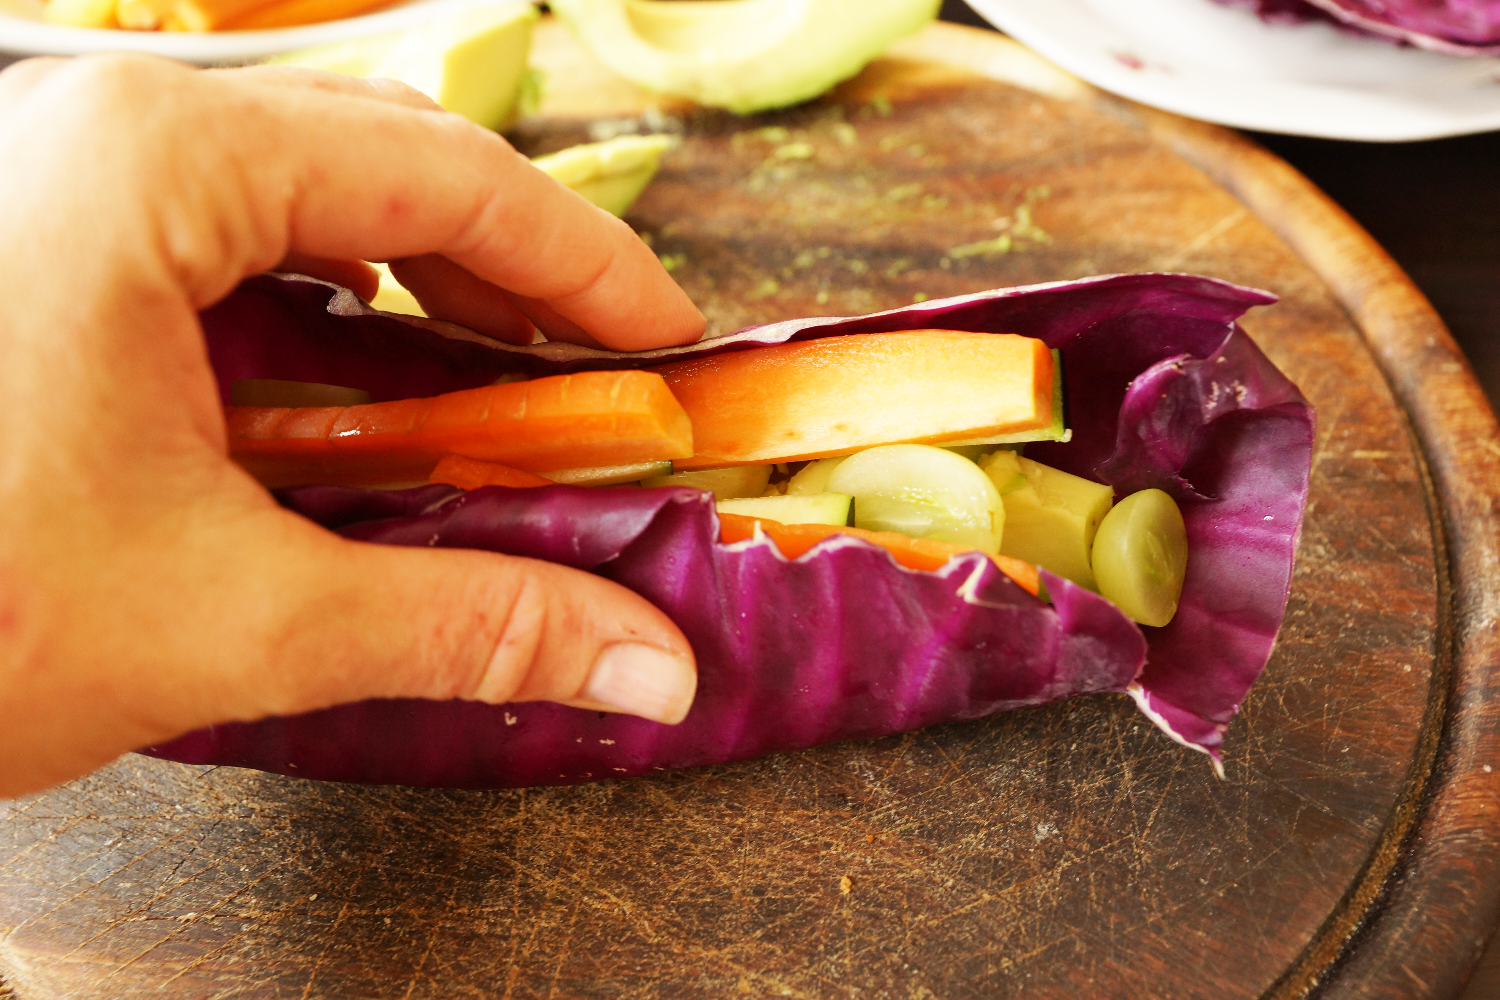
- Now you can choose whatever you like in your wrap
Ps.: Rotkraut steckt voller Vitamin K und Anthocyaninen, die die Konzentration und Gehirnfunktionen steigern. | Red Cabbage is full of vitamin K and anthocyanins that help with mental function and concentration.